If you have ever tried to post a video online only to realize it is the wrong length, the wrong shape, or looks blurry after editing, you are not alone. Getting video ready for different platforms can feel like a technical headache, especially without professional editing software or hours to spare. The good news is that free online tools have made it genuinely simple to trim footage, adjust aspect ratios, and download crisp, high-quality results in just a few minutes. You do not need to be a video editor or even particularly tech-savvy to get this done.
What “Trimming” Actually Means and Why It Matters
Before diving into tips and tools, it helps to understand what trimming a video actually does versus other types of editing. Trimming refers specifically to removing footage from the beginning or end of a clip so that only the portion you want remains. It is different from cutting, which typically involves splitting a video into multiple segments to rearrange or use separately.
Trimming matters because most social media platforms have strict time limits. Instagram Reels, TikTok videos, and Facebook posts all have different maximum durations, and uploading a video that is too long will either get rejected or auto-cropped in ways you did not intend. Trimming lets you stay in control of exactly what viewers see and for how long. It also eliminates dead air, awkward pauses, and anything before or after the moment you actually care about.
Beyond length, trimming tightens the overall feel of a video. Even a 30-second clip benefits from having a clean, intentional start and end point. Viewers are more likely to watch something all the way through when it does not open with several seconds of someone fumbling with their phone.
Why Aspect Ratio Matters as Much as Length
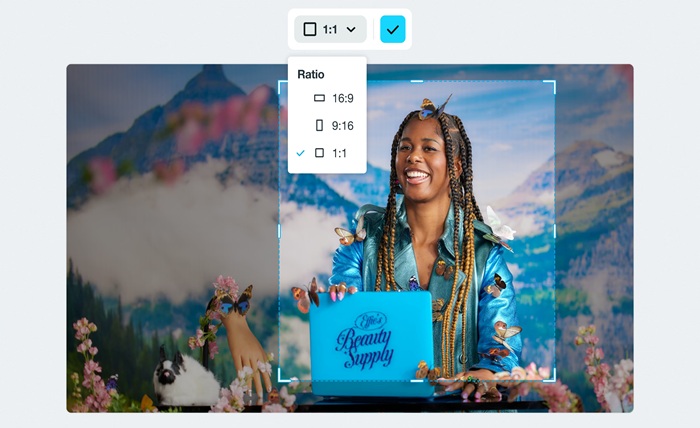
Aspect ratio is the relationship between the width and height of your video. A standard widescreen video is 16:9, which looks great on a desktop or TV screen but appears small and awkward when posted as a vertical Instagram Story or TikTok. The square format (1:1) works well for Facebook and Instagram feeds. Portrait orientation (9:16) is ideal for Reels, TikTok, and YouTube Shorts.
If you ignore aspect ratio and upload a horizontal video to a vertical-first platform, the platform will either add black bars on the sides, zoom in and crop out parts of your footage, or display it in a way that looks unintentional. None of those outcomes are ideal, especially if you are posting for a business, brand, or audience you are trying to grow.
Changing the aspect ratio before you download means you are delivering the exact format each platform expects, without leaving it up to an algorithm to decide how to handle your video.
Does Changing Aspect Ratio Hurt Video Quality?
This is one of the most common concerns people have, and it is a fair one. When you resize or reformat a video, there is always a risk of pixelation or blurriness, particularly if the tool you are using compresses the file during export. The key is to use a tool that outputs in a high-resolution format, such as MP4, and that does not aggressively reduce file size in ways that degrade the image.
The best free online trimmers preserve the original resolution of your footage even after you change the aspect ratio. Rather than shrinking the entire image, they let you reframe or reposition the video within the new dimensions so the quality of the footage itself stays intact. This is a meaningful difference from simply stretching or squishing the image, which will always result in some loss of clarity.
It also helps to start with the highest-quality source file you have. If your original footage is already compressed or low resolution, no tool will be able to make it sharper. Always work from the best version of your video before you begin editing.
8 Tips for Trimming Videos Online Without Losing Quality or Your Mind
1. Know Your Target Platform Before You Start
Before you upload anything, decide where the final video is going. Each platform has its own preferred aspect ratio, maximum file size, and recommended resolution. TikTok and Instagram Reels favor 9:16 vertical video. YouTube prefers 16:9 widescreen. Instagram feed posts look best at 1:1 square. Knowing this upfront means you only have to export once instead of going back and forth.
2. Use the Handlebar Method for Precise Trimming
Most online trimmers offer a timeline with draggable handles at each end of the clip. Rather than typing in exact timestamps, dragging these handles gives you a visual way to preview exactly where your video will begin and end. This is especially helpful for trimming to a natural pause, a laugh, or a specific action rather than just a number on a clock.
If the tool also allows you to type in manual timestamps, use both approaches together. Drag to get close, then fine-tune with exact seconds. This combination gives you the most control without requiring any technical expertise.
3. Reframe, Do Not Just Resize
When changing aspect ratio, look for a tool that lets you reposition your footage within the new frame rather than just automatically stretching it to fit. Repositioning means you can keep the most important part of your shot, whether that is a person’s face, a product, or a specific background, centered and visible in the new format. Auto-resizing without repositioning often cuts off heads or shifts the focal point in a way that looks sloppy.
4. Try a Practical How-To With Adobe Express
Here is a real-world example of how this works in practice. Say you have a one-minute video from a birthday party and you want to post a 15-second highlight to Instagram Stories in vertical format. You can trim video using Adobe Express by uploading your file, dragging the handles to select just the 15 seconds you want, then switching the aspect ratio to portrait so it fills a phone screen perfectly. Once you have repositioned the clip within the new frame, you can download it as a high-resolution MP4 and post it directly. The whole process takes under five minutes and requires no account, no software download, and no prior video editing experience. It works on desktop, tablet, and mobile, which means you can do it right from your phone if that is where your video already lives.
5. Mute or Replace Audio When Necessary
Changing aspect ratio or trimming a video can sometimes leave you with audio that no longer matches the visual, particularly if you trim out a section where someone was speaking or if background music cuts off awkwardly. Many free online tools give you the option to mute the audio entirely on your trimmed clip. This is useful when you plan to add music, a voiceover, or captions separately after downloading.
If you are creating content for social media, muting the original audio and pairing the clip with a trending sound on the platform itself is often a better strategy anyway, since native audio tends to perform better with platform algorithms.
6. Watch Your File Size Before Uploading
Most free online trimmers have a file size cap, often somewhere between 500MB and 1GB. If your original video is a large raw file straight from a camera or screen recorder, it may exceed the limit before you even begin editing. A quick way to get around this is to convert your file to MP4 format first if it is in a less compressed format like MOV or AVI. MP4 files are significantly smaller while maintaining comparable quality, and they are universally accepted by online tools and social platforms alike.
7. Download in the Highest Available Resolution
When it comes time to export your finished clip, always choose the highest resolution option available. Some free tools default to a lower quality setting to save processing time or storage on their end. Look for an option labeled HD, 1080p, or high quality before you hit download. A video that looks sharp on your phone screen before downloading can look noticeably softer if it was exported at a reduced resolution.
8. Do One Final Preview Before You Download
This sounds obvious, but it is easy to skip in the excitement of finishing. Before downloading your trimmed, reformatted clip, play it back from start to finish within the tool. Check that the beginning is clean, the ending is not cut off mid-sentence or mid-action, and the aspect ratio looks correct with no important elements cropped out. Catching a small issue at this stage takes seconds to fix. Catching it after you have already posted takes considerably more effort.
How to Choose the Right Free Online Video Trimmer
Not all free online tools are created equal, and a few key factors are worth checking before you commit to one. First, confirm that the tool actually allows aspect ratio changes and not just trimming. Some tools handle one function well but do not offer the other, which means you would have to run your video through two separate tools and risk a second round of compression.
Second, look at the output format. A tool that only exports in low-resolution or in a format other than MP4 may create compatibility issues when you go to upload your video elsewhere. MP4 is the most universally accepted format and typically produces the best balance of quality and file size.
Third, consider whether you need a free account or not. Some tools advertise as free but add a watermark to your exported video unless you create an account or upgrade to a paid plan. If a watermark is not acceptable for your use case, confirm that the tool you are using exports cleanly without one before you put in the time to edit.
Frequently Asked Questions
Will trimming a video reduce its quality?
Trimming a video on its own should not reduce quality at all, because you are simply removing footage rather than altering the pixels of what remains. The risk to quality comes during the export or download phase, when some tools compress the file more aggressively than necessary. To protect quality, always choose the highest resolution export option your tool offers and work from the highest-quality source file you have available. Starting with a compressed or low-resolution video and expecting a sharp result is the most common source of disappointment in online video editing.
What is the best aspect ratio for social media videos?
The best aspect ratio depends entirely on where you are posting. For TikTok, Instagram Reels, and YouTube Shorts, 9:16 vertical is the standard and fills the full screen on a mobile device. For Instagram feed posts, 1:1 square tends to take up the most real estate in the feed and catches the eye. For YouTube standard uploads, Facebook videos, and anything intended for desktop viewing, 16:9 widescreen is still the norm. If you are posting to multiple platforms, it is worth exporting two or three versions of the same clip in different aspect ratios rather than hoping one format looks good everywhere. A tool like Google Sheets can be a surprisingly useful way to keep track of your platform-specific export checklist, file names, and posting schedule when you are managing content across multiple channels.
Can I trim a video on my phone without downloading an app?
Yes, a number of free online video trimmers work directly in your mobile browser without requiring any app download. You can upload a video from your phone’s camera roll, make your edits, and download the result straight back to your device. The experience is generally smoother on a device with a larger screen simply because the timeline controls are easier to manipulate, but the functionality is the same. Make sure you are on a reliable Wi-Fi connection before uploading, especially for larger video files, to avoid interrupted uploads or slow processing times.
What happens to my original video file after I trim online?
Reputable free online tools do not delete or alter your original video file. When you upload to a browser-based trimmer, you are sending a copy of the file to a temporary server for processing. Your original video remains on your device exactly as it was. The trimmed version is a new file that you download separately. This means you can always go back to the original and make different edits if you change your mind about where you trimmed it. It is still good practice to read the privacy policy of any tool you use, particularly if your video contains personal, private, or business-sensitive content, since upload and storage practices vary by provider.
How do I trim a video to an exact length, like 60 seconds for Instagram?
The most reliable method is to use manual timestamp entry if your tool offers it. Rather than dragging handles and trying to land precisely on the 60-second mark, type in your exact start and end times. For example, if you want a 60-second clip starting at the 10-second mark of a longer video, you would enter 0:10 as the start and 1:10 as the end. Some tools also display a real-time duration counter as you drag the handles, which makes it easy to stop when you hit your target length. If you are consistently trimming content for a specific platform, it helps to note the exact time limits for each one: Instagram feed videos allow up to 60 seconds, Reels up to 90 seconds, and TikTok allows up to 10 minutes for most accounts, though shorter clips almost always perform better.
Conclusion
Trimming a video, changing its aspect ratio, and keeping the quality intact are three things that used to require dedicated software and a learning curve measured in hours. Today, free online tools have made this genuinely accessible to anyone with a phone or computer and a video they want to share. The key is understanding what each step does and in what order to do it: trim first to get the right length, then adjust the aspect ratio to match your platform, then export at the highest quality available.
Whether you are a small business owner repurposing footage for social media, a content creator optimizing clips for multiple platforms, or someone who just wants to cut down a video to send to a friend, the process does not have to be complicated. With the right free online tool and a few minutes of your time, you can go from raw footage to a polished, platform-ready clip without touching a single piece of professional software.